


When your lawn mower blade is not spinning freely, mowing your yard can quickly turn from relaxing weekend maintenance into a frustrating battle with your equipment. The smooth hum of a mower slicing through grass suddenly becomes a grinding, uneven sound—or worse, silence. The blade feels tight, hard to turn, or even stuck. This issue doesn’t just affect the quality of your cut—it can make mowing unsafe. A stuck or dragging blade can overheat parts, strain the engine, and create dangerous kickback risks. The good news? Most of the time, this problem has simple causes you can fix yourself with basic tools and a bit of patience.
In this detailed guide, we’ll walk through the most common reasons a mower blade stops spinning freely, how to safely diagnose the issue, and proven methods to restore smooth rotation. Whether you use a walk-behind mower or a riding mower, this guide will help you identify problems before they become costly repairs. Let’s dig in.
Understanding Why Blade Movement Matters
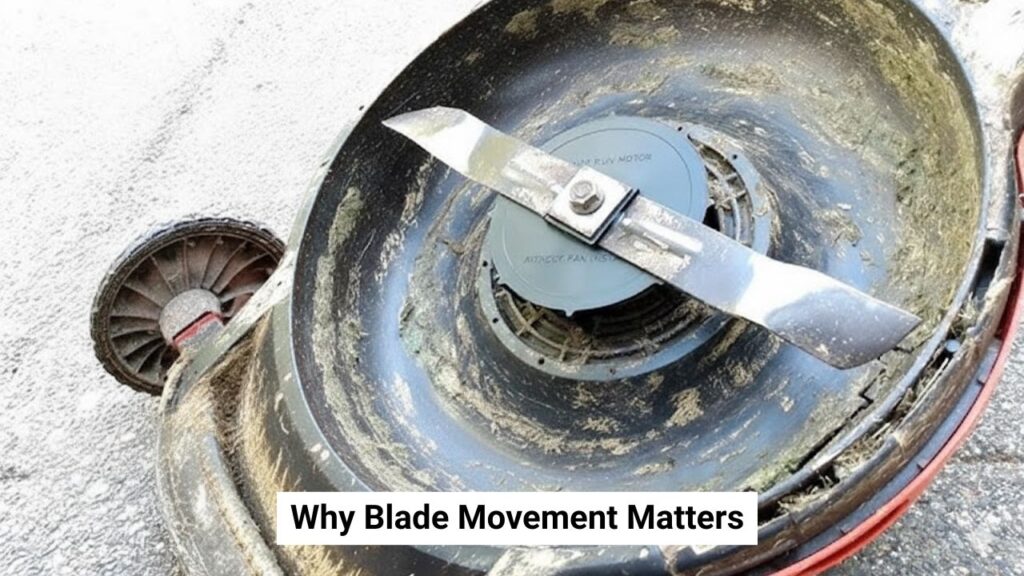
Before troubleshooting, it’s important to understand why your mower blade should spin freely. The blade’s ability to rotate smoothly is essential for consistent airflow under the deck, which lifts and cuts grass evenly. When the blade meets resistance, that airflow is disrupted. The result? Uneven cuts, clumps of grass, and overworked motors.
A lawn mower blade not spinning freely usually signals one of three things: mechanical binding, debris obstruction, or internal wear. Think of it like a bicycle wheel—if something’s caught in the spokes, the wheel stops. But if the bearings are dry or damaged, the wheel grinds. The same applies here. Your mower blade connects to the spindle and engine shaft through bearings, pulleys, and belts. If any of these parts bind up, even slightly, the blade feels stiff or won’t move at all.
Understanding this connection helps you troubleshoot more intelligently instead of guessing. When you feel resistance, your goal is to isolate whether it’s external (like debris) or internal (like bearings or brake systems) causing it.
Common Causes of a Lawn Mower Blade Not Spinning Freely
Let’s explore the most frequent culprits behind a stiff or jammed blade. Knowing these causes upfront helps narrow your troubleshooting and saves time.
| Cause | Description | Severity | DIY Difficulty |
|---|---|---|---|
| Grass buildup or debris under deck | Wet grass and dirt packed under the mower deck cause drag | Low | Easy |
| Bent or damaged blade | Impacts from rocks or roots can warp the blade | Medium | Moderate |
| Overtightened blade bolt | Excess torque crushes spacers and increases friction | Low | Easy |
| Seized spindle bearings | Bearings inside the deck mandrel freeze or wear out | High | Moderate to Hard |
| Engaged blade brake | Brake arm or cable stuck in engaged position | Medium | Easy |
| Belt or PTO clutch issue | Belt misalignment or clutch drag stops free motion | High | Moderate |
| Bent crankshaft | Impact damage causing wobble or uneven spin | Severe | Professional Repair |
These causes range from quick 10-minute fixes to major repairs. But don’t worry—you’ll learn exactly how to handle each one step-by-step.
Step 1: Safety First—Prepare Before You Touch the Blade
Before you grab a wrench or tilt the mower, safety comes first. Even a stationary mower can be dangerous if you skip precautions. Always disconnect the power source before working under the deck. For walk-behind mowers, remove the spark plug wire so there’s zero chance of accidental ignition. For riding mowers, remove the key, disconnect the battery’s negative cable, and set the parking brake.
Once the power is disconnected, tip your mower correctly. Always tilt it with the carburetor and air filter side facing up to prevent oil or fuel from leaking into the engine. This small detail can save you a messy cleanup later. Wear cut-resistant gloves to protect your hands from sharp edges and use a sturdy block of wood to keep the blade from turning unexpectedly.
Taking 5 extra minutes for safety can save hours of frustration—or worse, injury.
Step 2: Quick Deck Cleaning and Debris Removal
In many cases, the solution is as simple as clearing out what’s stuck underneath. Wet grass, twigs, and small stones can collect under the deck and choke the blade’s movement. If your lawn mower blade is not spinning freely, start here first—it’s the most common and easiest fix.
Tip the mower carefully and inspect the underside of the deck. Use a plastic scraper or putty knife to remove built-up clumps of grass. Avoid metal tools that could scratch the deck’s protective coating. Look closely around the blade tips and spindle area for any hidden objects like wire, rope, or vine that could be wrapped around the shaft. These are often overlooked but can completely lock up the blade.
Once you’ve cleaned the deck, gently rotate the blade by hand. It should move smoothly without much resistance. A slight stop-and-go feeling might just be the brake engaging, which we’ll address later. But if the blade still feels gritty or tight, you’ll need to check deeper mechanical components next.
Step 3: Inspect the Blade and Mounting Hardware
If cleaning doesn’t help, the problem might lie with the blade itself or the parts holding it in place. A bent blade or damaged adapter can easily cause friction or imbalance. You might also be dealing with an overtightened blade bolt, which compresses the washers and creates drag against the spindle.
Start by wedging a block of wood between the deck and blade to prevent it from turning. Then, use the correct socket to loosen the bolt (usually counterclockwise). Take note of how washers and spacers are arranged—you’ll need to reinstall them in the exact same order. Once the blade is off, inspect it closely. Lay it on a flat surface to check for warping. If any corner lifts off the surface by more than 1/8 inch, it’s time for a replacement.
Next, inspect the blade adapter or hub for cracks, burrs, or worn keyways. A damaged adapter can cause the blade to sit unevenly, increasing resistance. Clean all contact points with a wire brush and lightly sand away rust or debris. When reinstalling, make sure the blade’s cutting edge faces the right direction—the curved lift side should point upward toward the deck.
Use a torque wrench to tighten the bolt properly: around 30–60 ft-lb for walk-behinds and 70–90 ft-lb for riding mowers. Over-tightening can do more harm than good. After reinstalling, spin the blade by hand—it should now move with ease.
Step 4: Check the Blade Brake or Bail Cable (For Walk-Behind Mowers)
Many walk-behind mowers have a blade brake system that automatically stops the blade when you release the handle. While this safety feature is essential, it can sometimes malfunction and stay partially engaged, even when the bail is pulled. When that happens, your lawn mower blade won’t spin freely no matter how clean your deck is.
To diagnose this, watch the brake arm while squeezing the handle. It should pull away completely from the pulley or flywheel area. If it doesn’t move enough, the cable may need adjusting. You’ll usually find an adjuster near the handle or along the cable itself. Turn it slightly until the brake fully releases when you pull the handle, but ensure it still stops the blade when released.
Lubricate the cable pivot points with a dry silicone or graphite spray, but never use greasy lubricants—they can attract dirt and interfere with brake performance. If the brake pad itself looks worn or uneven, replace it according to your mower’s manual. After adjusting, test the blade by rotating it manually. With the bail released, it should stay locked. When pulled, it should spin much more freely.
This simple adjustment often solves a stubborn drag problem that many owners mistake for mechanical failure.
Step 5: Examine the Spindle Bearings (Walk-Behind and Riding Mowers)
If you’ve gone through cleaning and brake checks and the lawn mower blade still won’t spin freely, your spindle bearings might be to blame. These bearings allow the spindle shaft to rotate smoothly inside the deck housing. When they wear out or seize, you’ll feel grinding, stiffness, or a complete lockup.
To test this, remove the blade and adapter, then try spinning the spindle shaft by hand. It should glide effortlessly. If it feels rough or barely moves, the bearings are likely seized. For walk-behind mowers, these are often sealed bearings pressed into the deck, which means you’ll need to replace the entire bearing or spindle assembly.
Riding mowers use deck mandrels, which are more complex. Start by removing the deck belt (noting its routing for later). Spin each pulley by hand—any roughness, noise, or stiffness indicates worn bearings. Replacing the mandrel involves removing the pulley nut, blade, and mounting bolts, then installing a new unit.
Replacing bearings or mandrels might sound intimidating, but with basic socket tools and patience, it’s manageable for most DIYers. Once replaced, your blade should rotate as if brand new—smooth, silent, and free.
Step 6: Inspect the Belt and PTO Clutch (For Riding Mowers)
If you own a riding mower, your issue might not be with the blade or bearings at all—it could be in the belt or PTO clutch. These components engage and disengage the blades, and if the belt is misrouted, too tight, or the clutch is dragging, the blades won’t spin freely even when the PTO is off.
Start by comparing your belt’s routing to the diagram usually printed under the seat or in your manual. Even one misplaced pulley can cause severe tension. Check the belt’s surface for cracks or glazing. If it’s stretched or frayed, replace it with an OEM part of the exact same length and width.
Step 7: Check for a Bent Crankshaft
If you’ve tried cleaning, adjusting, and replacing parts but your lawn mower blade is still not spinning freely, it’s time to look at the crankshaft. This is the metal shaft that connects your mower’s engine to the blade. When your mower hits a hard object like a rock, stump, or thick root, the impact can bend the crankshaft slightly. Even a tiny bend can cause the blade to wobble, scrape the deck, or feel tight when you try to spin it by hand.
You can perform a simple test to check for this. Remove the spark plug and blade, then rotate the crankshaft slowly. Watch how the end of the shaft moves. If it wobbles even slightly, the shaft might be bent. Another quick method is to reinstall the blade and spin it by hand while watching the distance between the blade tip and deck edge. If the gap changes as the blade turns, that’s another clear sign of a bend.
A dial indicator tool gives the most accurate reading. Place it against the shaft end and check for more than 0.005 to 0.010 inches of runout. If you find more, the crankshaft is likely damaged. Unfortunately, bent crankshafts are not easy DIY repairs. Some shops have tools to straighten minor bends, but replacing the crankshaft—or even the entire engine—is usually safer and more reliable. If your mower is older, it may be more cost-effective to replace the unit altogether.
How to Prevent Future Blade Binding
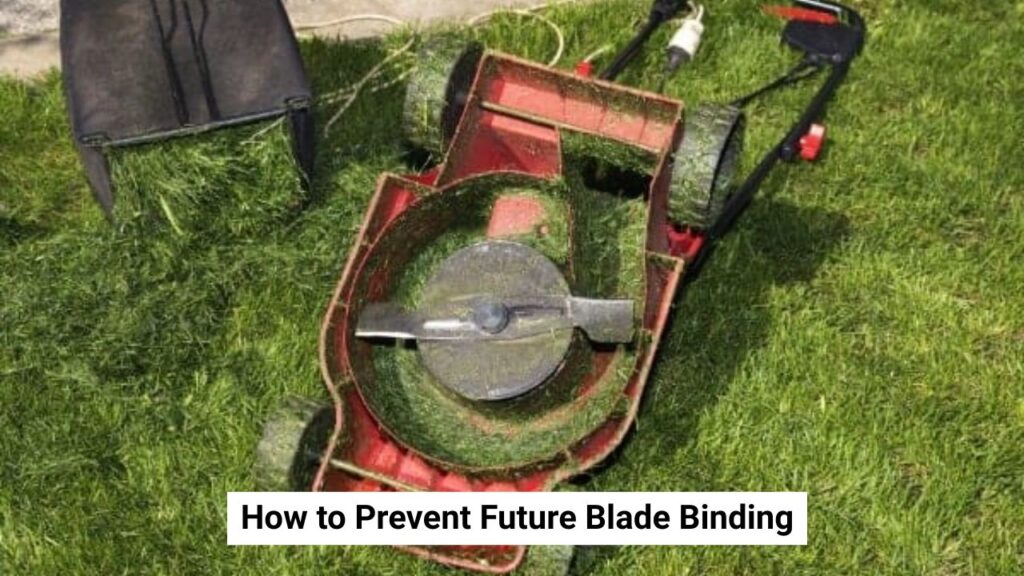
Once your mower blade is spinning freely again, you’ll want to keep it that way. The best maintenance is proactive. Preventing buildup, corrosion, and part wear saves time and keeps your machine running smoothly all season.
Here are some habits to develop after each mow:
- Clean the deck regularly: Grass, especially when wet, sticks under the deck and creates drag. Scrape it out after every use.
- Sharpen and balance blades: Dull or uneven blades stress the spindle and create vibration. Sharpen every 20–25 hours of mowing.
- Check torque on bolts: Tighten to manufacturer specs using a torque wrench to prevent overtightening and friction.
- Inspect belts and pulleys: Replace cracked or stiff belts and keep tensioners lubricated.
- Store in a dry place: Rusted bearings and adapters cause stiffness over time.
- Adjust brake cables periodically: Loose or sticking cables can leave the brake partially engaged.
Here’s a quick preventive checklist you can keep handy:
| Maintenance Task | Frequency | Benefit |
|---|---|---|
| Deck scraping | After every mow | Prevents buildup and friction |
| Blade sharpening | Every 20–25 hours | Improves cut and reduces stress |
| Bearing check | Every season | Detects wear before failure |
| Belt inspection | Twice a year | Prevents misalignment drag |
| Cable adjustment | As needed | Ensures brake releases fully |
Following these steps will keep your mower’s moving parts light, balanced, and efficient, preventing future issues where the lawn mower blade won’t spin freely.
Pro Tips from Experienced Mower Owners
Sometimes, small changes in how you mow or maintain your machine can make a big difference. Here are some field-tested tips from professionals and experienced users that can help your mower stay in great shape:
- Always wear gloves when working near the blade, even when the engine is off. A dull blade can still cut skin.
- Use a deck wash port if your mower has one. Run water through it after mowing to clear grass and reduce buildup.
- Apply a non-stick deck coating or dry graphite spray. This reduces grass sticking to the deck and makes future cleaning easier.
- Replace idler pulleys in pairs. When one fails, the other is often close behind.
- Keep a photo of your belt routing. It saves time during reassembly and ensures you don’t misroute the belt, which can cause binding.
- Use OEM parts whenever possible. Off-brand blades or belts often fit poorly, leading to vibration and friction.
- Stop mowing immediately if you hit something hard. Check the blade and spindle before continuing. Running with a bent part can lead to engine damage or accidents.
Think of these as your mower’s “good habits.” The more consistently you apply them, the less likely you’ll ever face a blade that feels stuck again.
When to Call a Professional
Sometimes, despite your best effort, your lawn mower blade still won’t spin freely. At that point, you need to decide if it’s worth tackling the problem yourself or letting a qualified technician handle it. Certain repairs require special tools, precision, and experience to ensure safety.
You should call a professional if:
- You’ve cleaned the deck, checked the brake, and replaced the blade, but it’s still tight.
- You hear grinding or roaring sounds from the spindle area.
- The PTO clutch won’t disengage or needs adjustment you’re unsure about.
- The crankshaft might be bent, or the mower vibrates severely.
- You find cracks in the deck shell, mandrel housing, or frame.
When selecting a repair shop, look for brand-certified service centers or those with strong reviews for your specific mower type. Ask for written estimates that include parts, labor, and warranty details. Most reputable services guarantee their work for at least 30 to 90 days.
Typical Repair Costs
| Repair Type | Parts (Approx.) | Labor (Approx.) |
|---|---|---|
| Blade replacement | $20–$70 | $30–$80 |
| Spindle/mandrel assembly | $50–$180 | $80–$200 |
| Electric PTO clutch | $150–$350 | $100–$200 |
| Belt and idler service | $40–$150 | $60–$150 |
| Crankshaft or engine replacement | $300–$700+ | Varies widely |
While professional repair might seem expensive, it often saves you from buying a new mower or risking injury from a bad DIY job. Plus, if your mower is still under warranty, using authorized service helps protect your coverage.
Warranty and Safety Considerations
Your mower’s warranty can be affected by the type of parts you use or the repairs you perform. Always use OEM-approved blades, belts, and clutches, and keep receipts for all maintenance. If your mower is under manufacturer warranty, avoid modifying torque specs or clutch settings on your own.
For safety, never bypass the blade brake system or safety interlocks. These mechanisms are designed to stop the blade instantly when you release the handle or disengage the PTO. Tampering with them might make the mower feel freer temporarily, but it introduces serious risk and violates most safety standards.
Alternative Solutions for Chronic Blade Binding
If your mower repeatedly experiences binding issues, even after proper maintenance, there are a few upgrades and adjustments that can help. These changes might not fix the root mechanical problem, but they can make your mower run smoother under specific conditions.
| Solution | Advantages | Drawbacks | Ideal Situation |
|---|---|---|---|
| High-lift blade | Improves airflow, reduces clogging | Puts more load on engine | Side discharge mowing |
| Non-stick deck spray | Prevents grass sticking | Requires regular reapplication | Wet or thick grass |
| Mulching kit | Cleaner cut, smaller clippings | Can clog in damp conditions | Frequent mowing, dry lawns |
| Aluminum or fabricated deck | Resists corrosion and buildup | More expensive | Heavy-duty or commercial mowing |
Sometimes, improving deck design or blade style for your mowing conditions can drastically reduce how often you face a lawn mower blade not spinning freely issue.
Get Your Mower Spinning Smoothly Again
A freely spinning blade is the heart of a healthy mower. Once you understand how debris, bearings, brakes, and belts work together, troubleshooting becomes straightforward. Start with the simple fixes—clean the deck, inspect the blade and adapter, and check cable adjustments. Then move to spindle bearings, belts, or clutch inspections if needed. In most cases, your mower will be back to normal in under an hour.
Remember the key checklist for restoring blade freedom:
- Clear the deck and remove all debris.
- Inspect and balance the blade.
- Torque the bolt correctly.
- Adjust the brake cable to ensure full release.
- Check bearings and belts for wear.
- Diagnose bent shafts before continuing to mow.
Following these steps ensures your mower not only cuts evenly but also operates safely. A smooth, free-spinning blade reduces engine load, fuel consumption, and wear—helping your mower last longer and perform better.
FAQs About Lawn Mower Blade Not Spinning Freely
Q1. My mower blade is hard to turn by hand. Is that normal?
Not usually. A small amount of resistance is okay, especially if your mower has a brake system that engages when off. But if it’s stiff even with the brake released, something’s binding—check for debris, rust, or a bent blade.
Q2. Can overtightening the blade bolt cause friction?
Yes. Over-torqueing can crush spacers or deform the adapter, causing drag. Always use a torque wrench and follow your mower’s specifications.
Q3. How do I know if my spindle bearings are bad?
With the blade or belt removed, spin the spindle shaft. If you feel grinding, hear scraping, or notice heat after short use, the bearings are likely worn or seized and need replacement.
Q4. What if my blade scrapes the deck?
That’s a red flag for a bent blade, adapter, or crankshaft. Try replacing the blade first; if the scraping remains, inspect the spindle and measure crankshaft runout.
Q5. Should I lubricate the spindle bearings?
Many modern mowers have sealed bearings that don’t require grease. However, some riding mowers include grease fittings—check your manual before applying lubricant.
Q6. My riding mower blades don’t spin freely when PTO is off—is that okay?
No. They should spin with light drag only. Check belt routing, tensioner operation, and clutch air gap. A dragging clutch can cause resistance.
Q7. Is it safe to tip my mower on its side for cleaning?
Yes, as long as you tilt it with the carburetor and air filter side facing up. This prevents oil from leaking into the engine. Always disconnect the spark plug first.
Final Thoughts
If your lawn mower blade is not spinning freely, don’t panic. In most cases, it’s a simple issue like debris buildup, a dull blade, or a misadjusted brake. The key is to start with small, safe checks and work your way toward more complex components. With careful attention, you can bring your mower back to smooth operation without spending much money.
