You can change riding lawn mower blades by safely preparing the mower, removing the cutting deck or accessing the blade assembly, replacing the old blades with correctly matched new ones, and reinstalling everything securely before mowing again.
Across the United States, homeowners rely on riding lawn mowers to maintain suburban yards, large lawns, and rural properties. After months of cutting grass during the growing season, mower blades can become dull, bent, or damaged, causing uneven cuts and putting extra strain on the machine.
Changing riding lawn mower blades is a maintenance task many owners can complete with basic tools, but safety is essential. The mower must be turned off completely, the ignition key removed, and the blades prevented from moving before any work begins. Using the correct replacement blades for the exact mower model is also necessary for proper cutting performance and safe operation.
What You Need Before Changing Riding Lawn Mower Blades
Before replacing riding mower blades, gather the necessary tools and confirm that you have the correct replacement parts. Preparing everything first reduces the chance of mistakes while the mower is open.
Most riding lawn mower blade replacements require common hand tools, but the exact requirements vary by mower brand and model. Always check the owner’s manual for blade specifications and removal instructions when available.
Source: YouTube > Sears PartsDirect
Safety equipment
Wear work gloves and safety glasses to protect your hands and eyes from sharp blade edges, dirt, and debris.
Basic tools
Common tools include a socket wrench set, breaker bar, blocks or jack stands for support, and a torque wrench if the manufacturer specifies tightening requirements.
Replacement blades
Choose blades that match the mower model, deck size, mounting hole design, and cutting system.
How to Know If Your Riding Mower Blades Need Replacement
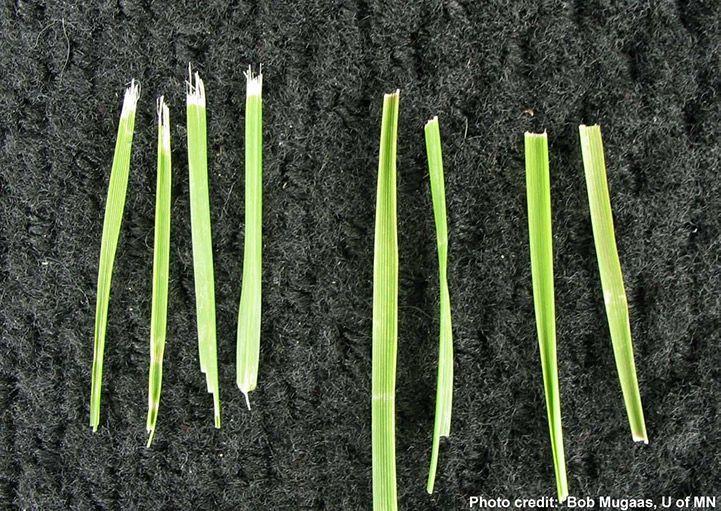
Riding mower blades usually need replacement when sharpening is no longer enough to restore a proper cutting edge. A damaged blade can affect grass health and mower performance.
Uneven grass cutting
A lawn that looks patchy or has uncut strips after mowing may indicate worn or damaged blades.
Visible blade damage
Cracks, bends, missing sections, or severe corrosion are signs that replacement is safer than continued use.
How to Change Riding Lawn Mower Blades Step by Step
The basic blade replacement process involves securing the mower, accessing the cutting deck, removing the old blades, installing new blades in the correct position, and checking the mower before operation.
Different riding mower designs vary, so follow the manufacturer’s instructions whenever they differ from the general steps below.
Source: storage.googleapis.com
Step 1: Park and secure the mower
Park the mower on a flat surface, engage the parking brake, turn off the engine, remove the key, and allow hot components to cool.
Step 2: Disconnect the power source
Disconnect the battery or spark plug connection according to the mower design to prevent accidental starting.
Step 3: Access the cutting deck
Raise the mower safely or remove the deck if required by your mower model to reach the blade assembly.
Step 4: Remove the old blades
Hold the blade securely with a suitable tool and loosen the blade bolt using the correct socket size.
Step 5: Install the replacement blades
Place the new blade in the same orientation as the original, ensuring the cutting edge faces the correct direction.
Step 6: Tighten and inspect
Secure the blade fastener according to manufacturer specifications and check that the blade moves correctly without interference.
Correct installation is critical because an incorrectly mounted blade can reduce cutting quality and create a safety hazard. The raised side of many mower blades must face upward toward the mower deck, while the cutting edge faces the direction of rotation.
After installation, confirm that all blades are positioned evenly and that no tools or loose parts remain under the mower deck.
Match the old blade position
Compare the replacement blade with the removed blade before installation to confirm orientation and mounting compatibility.
Check blade balance
A balanced blade helps reduce vibration and unnecessary stress on mower components.
Common Problems After Replacing Riding Lawn Mower Blades
If the mower does not cut correctly after blade replacement, the issue may come from installation errors, incorrect parts, or other mower components rather than the new blades themselves.
Troubleshooting should start with simple and safe checks before investigating mechanical problems.
Source: dreamer.herveperdriel.com
Mower vibrates heavily
Possible causes include an unbalanced blade, loose mounting hardware, bent spindle, or damaged deck components.
Grass is still uneven
Check blade direction, cutting height settings, deck leveling, and whether the replacement blades match the mower.
Blade will not fit
The replacement blade may have the wrong mounting hole pattern, length, or design for the mower model.
When You Should Not Replace Blades Yourself
DIY blade replacement may not be appropriate if the mower has damaged blade spindles, a cracked deck, seized hardware, or other mechanical issues. In these cases, professional inspection can prevent further damage.
Damaged spindle
A worn spindle can cause blade wobble and should be repaired before installing new blades.
Severely rusted hardware
Corroded bolts or mounting parts may require specialized tools or replacement.
How Often Should You Change Riding Lawn Mower Blades
The replacement schedule depends on mowing frequency, lawn conditions, blade quality, and exposure to obstacles such as rocks or branches. Many homeowners inspect blades several times during the mowing season and replace them when damage or excessive wear appears.
Regular blade maintenance improves cutting results and helps the mower operate efficiently.
Source: detroitchinatown.org
Light residential mowing
Homeowners with smaller lawns may only need replacement when blades become dull or damaged.
Heavy mowing conditions
Large properties or rough terrain can wear blades faster and require more frequent inspection.
Safety Tips for Changing Riding Lawn Mower Blades
Riding mower blades are heavy, sharp, and connected to powerful machinery, so safety precautions should always come before speed or convenience.
Never place hands near the blade area while the mower can move, and never rely only on hydraulic systems or the mower deck lift to support the machine.
Source: storage.googleapis.com
Prevent accidental starting
Remove the ignition key and disconnect the power source before working near the blade assembly.
Support the mower safely
Use appropriate supports instead of relying only on a jack or unstable lifting method.
Handle blades carefully
Even old blades can have sharp edges and should be handled with protective gloves.
Frequently Asked Questions
Q
How long does it take to change riding lawn mower blades?
For many homeowners, replacing riding mower blades takes about 30 minutes to a few hours depending on the mower design, tool availability, and whether the deck must be removed.
Q
Can I change riding mower blades without removing the deck?
Some riding mowers allow blade access without removing the deck, while others require deck removal for safe and practical access. Follow the instructions for your specific mower model.
Q
Should I sharpen or replace riding mower blades?
Sharpening may restore a dull blade, but replacement is usually better when the blade is cracked, bent, heavily worn, or damaged.
Q
How do I know which replacement blades fit my riding mower?
Use the mower model number, deck size, and manufacturer specifications to identify compatible blades. Blade appearance alone is not enough to confirm fit.
Q
Why is my riding mower shaking after changing blades?
Excessive vibration can result from incorrect installation, an unbalanced blade, loose hardware, or damage to the spindle or deck. Inspect these areas before mowing again.
✦ Wrapping Up
Conclusion
Changing riding lawn mower blades is a practical maintenance task when done with the correct tools, compatible replacement blades, and proper safety precautions. The process mainly involves securing the mower, removing worn blades, installing new ones correctly, and checking the equipment before use.
Regular blade inspections help maintain a cleaner cut and reduce unnecessary strain on the mower. If you find damaged mounting parts or mechanical problems during the process, repair those issues before returning the mower to service.
💡 Key Takeaway
Inspect your riding mower blades before the next mowing session, replace damaged blades with the correct model-specific parts, and prioritize safety throughout the entire process.
If you’ve ever struggled with uneven grass, scalped patches, or a mower deck that refuses to stay in place, you already know how vital the lawn mower height adjustment lever is. This small but powerful component determines how your mower adapts to the landscape. When it wears out or breaks, your mower can no longer…
Few things are more frustrating than getting ready to mow your yard, only to find your DeWalt lawn mower not working. You’ve charged the batteries, adjusted the handle, and yet — nothing happens. Or worse, it starts and stops within seconds. If you own a cordless or corded DeWalt mower, this problem can leave you…
If you’ve ever spent a Saturday morning tugging at your mower’s cord only to hear sputters instead of a roar, you know how frustrating it feels when your lawn mower engine gives out. It’s like the heart of your machine suddenly stopped beating. You’ve sharpened the blades, cleaned the deck, and checked the fuel —…