
How To Replace Lawn Mower Discharge Cover: Easy Guide
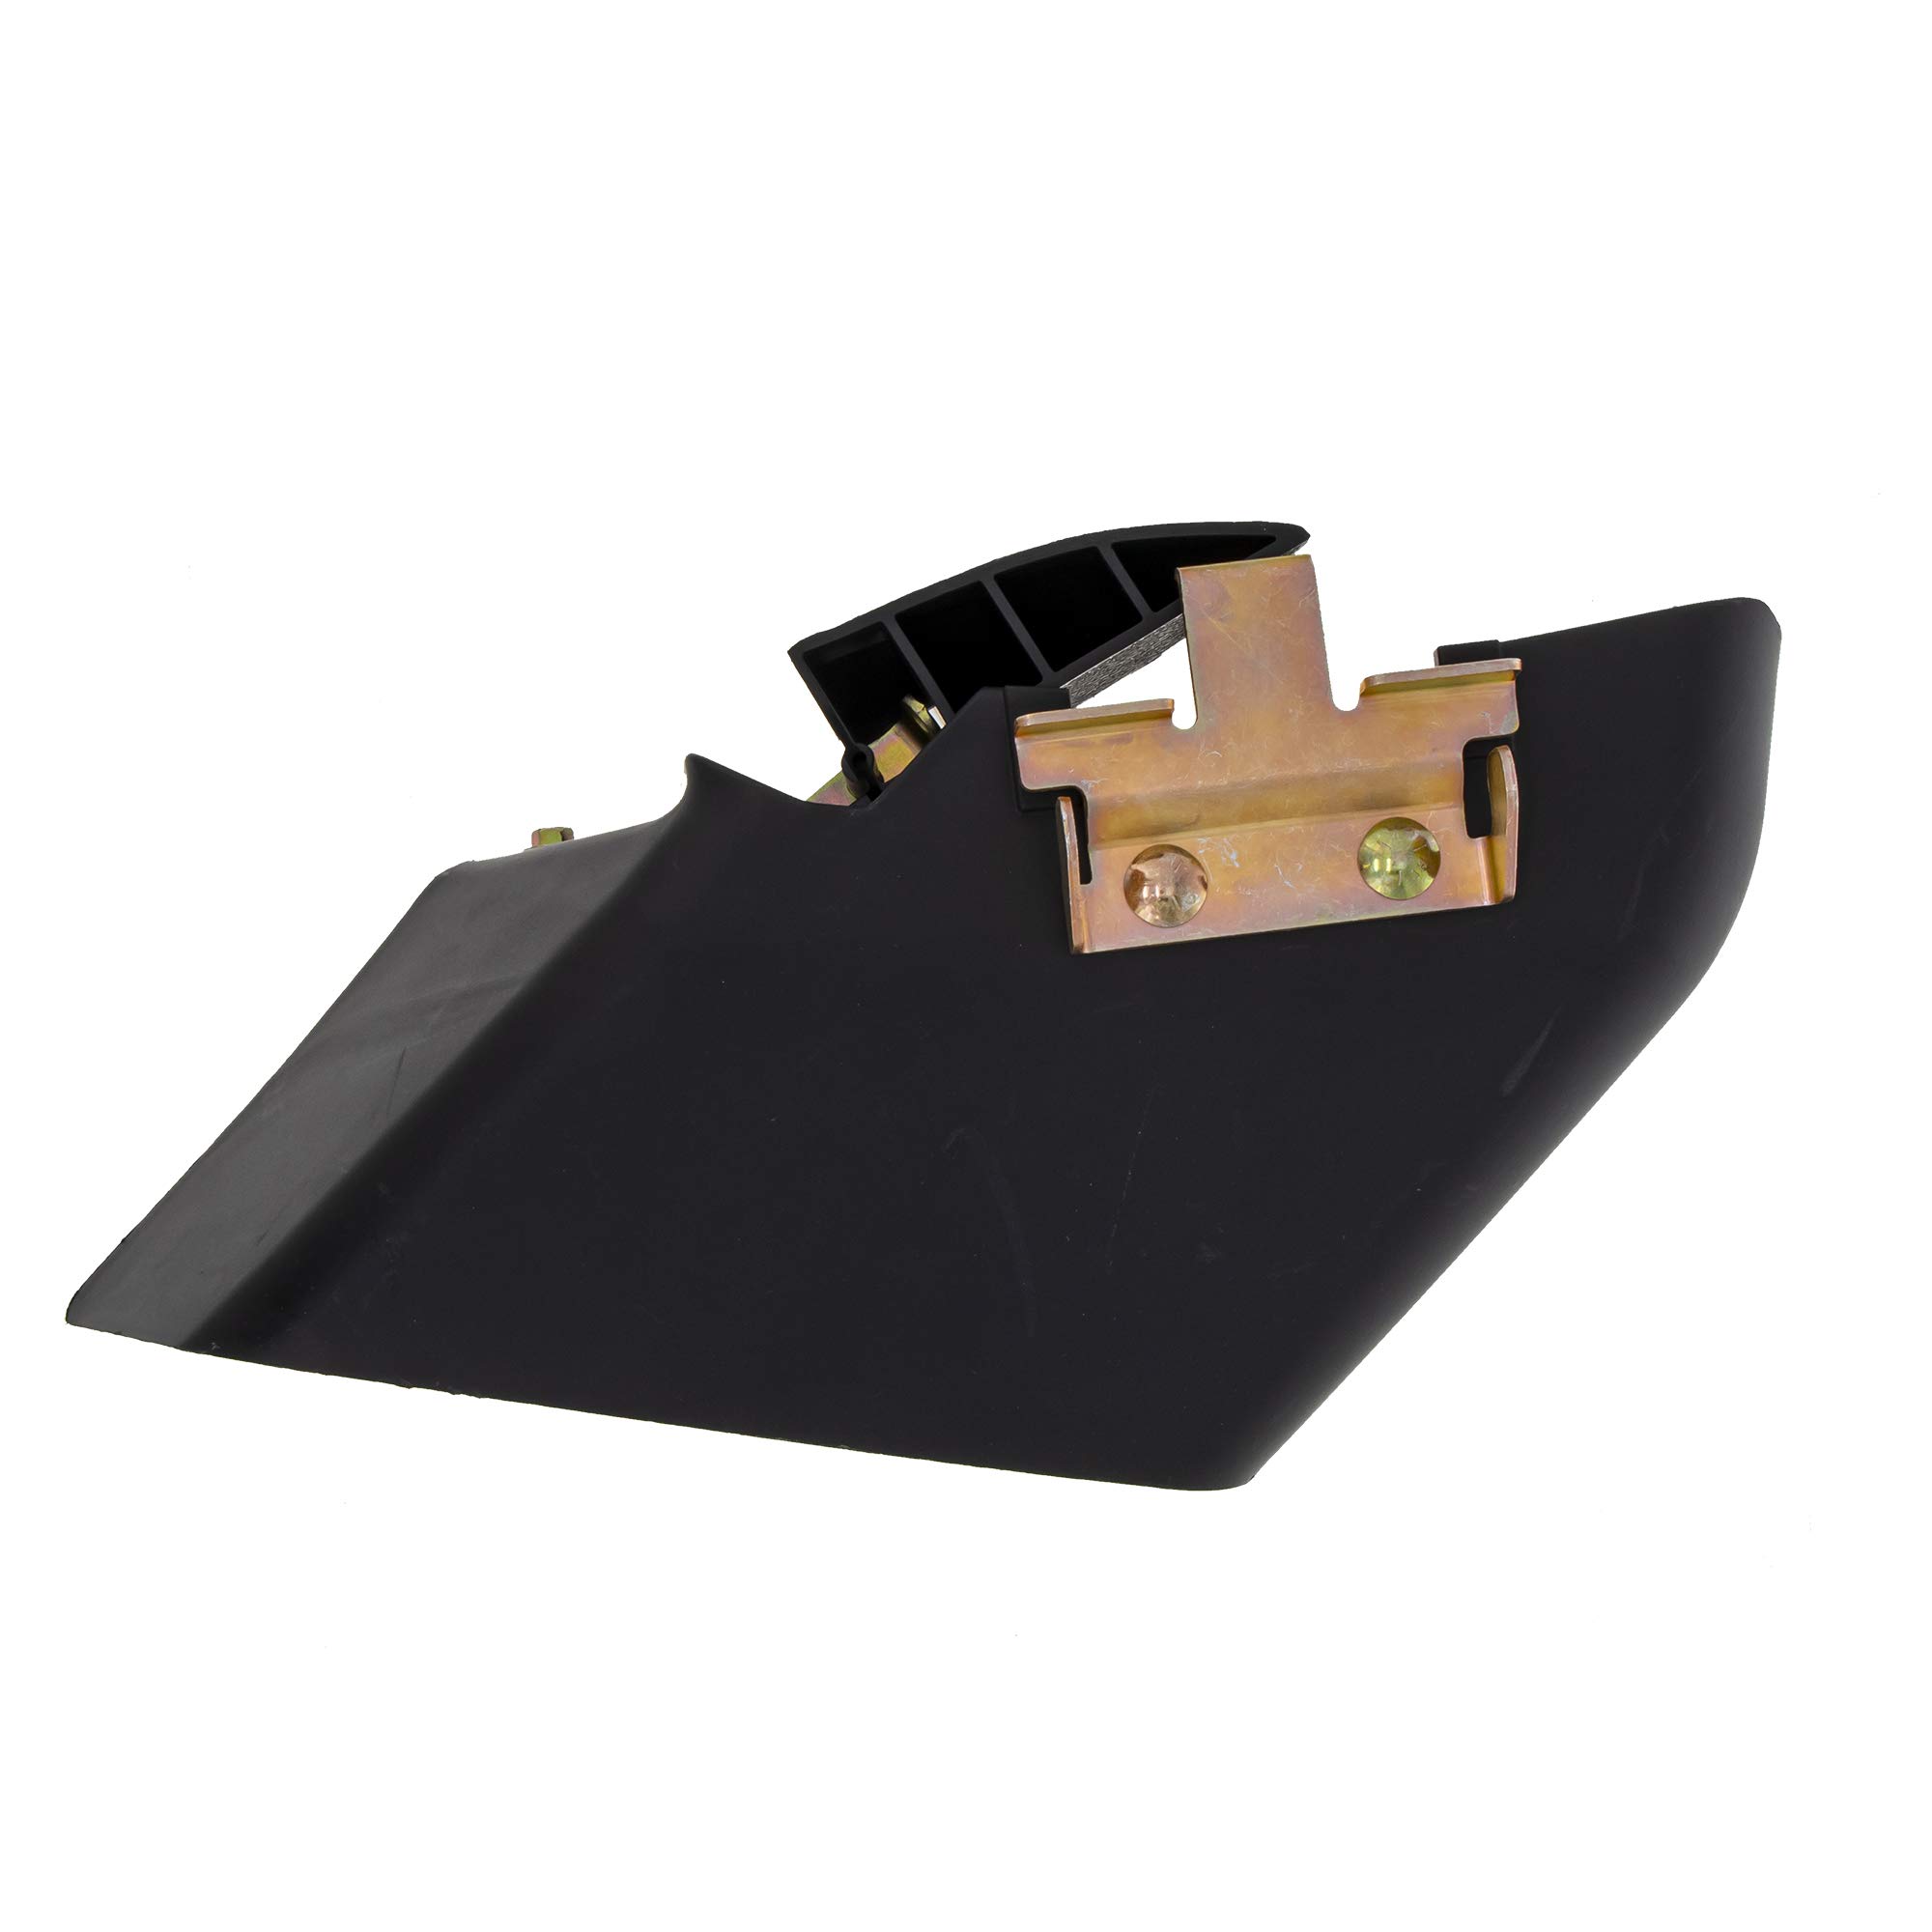
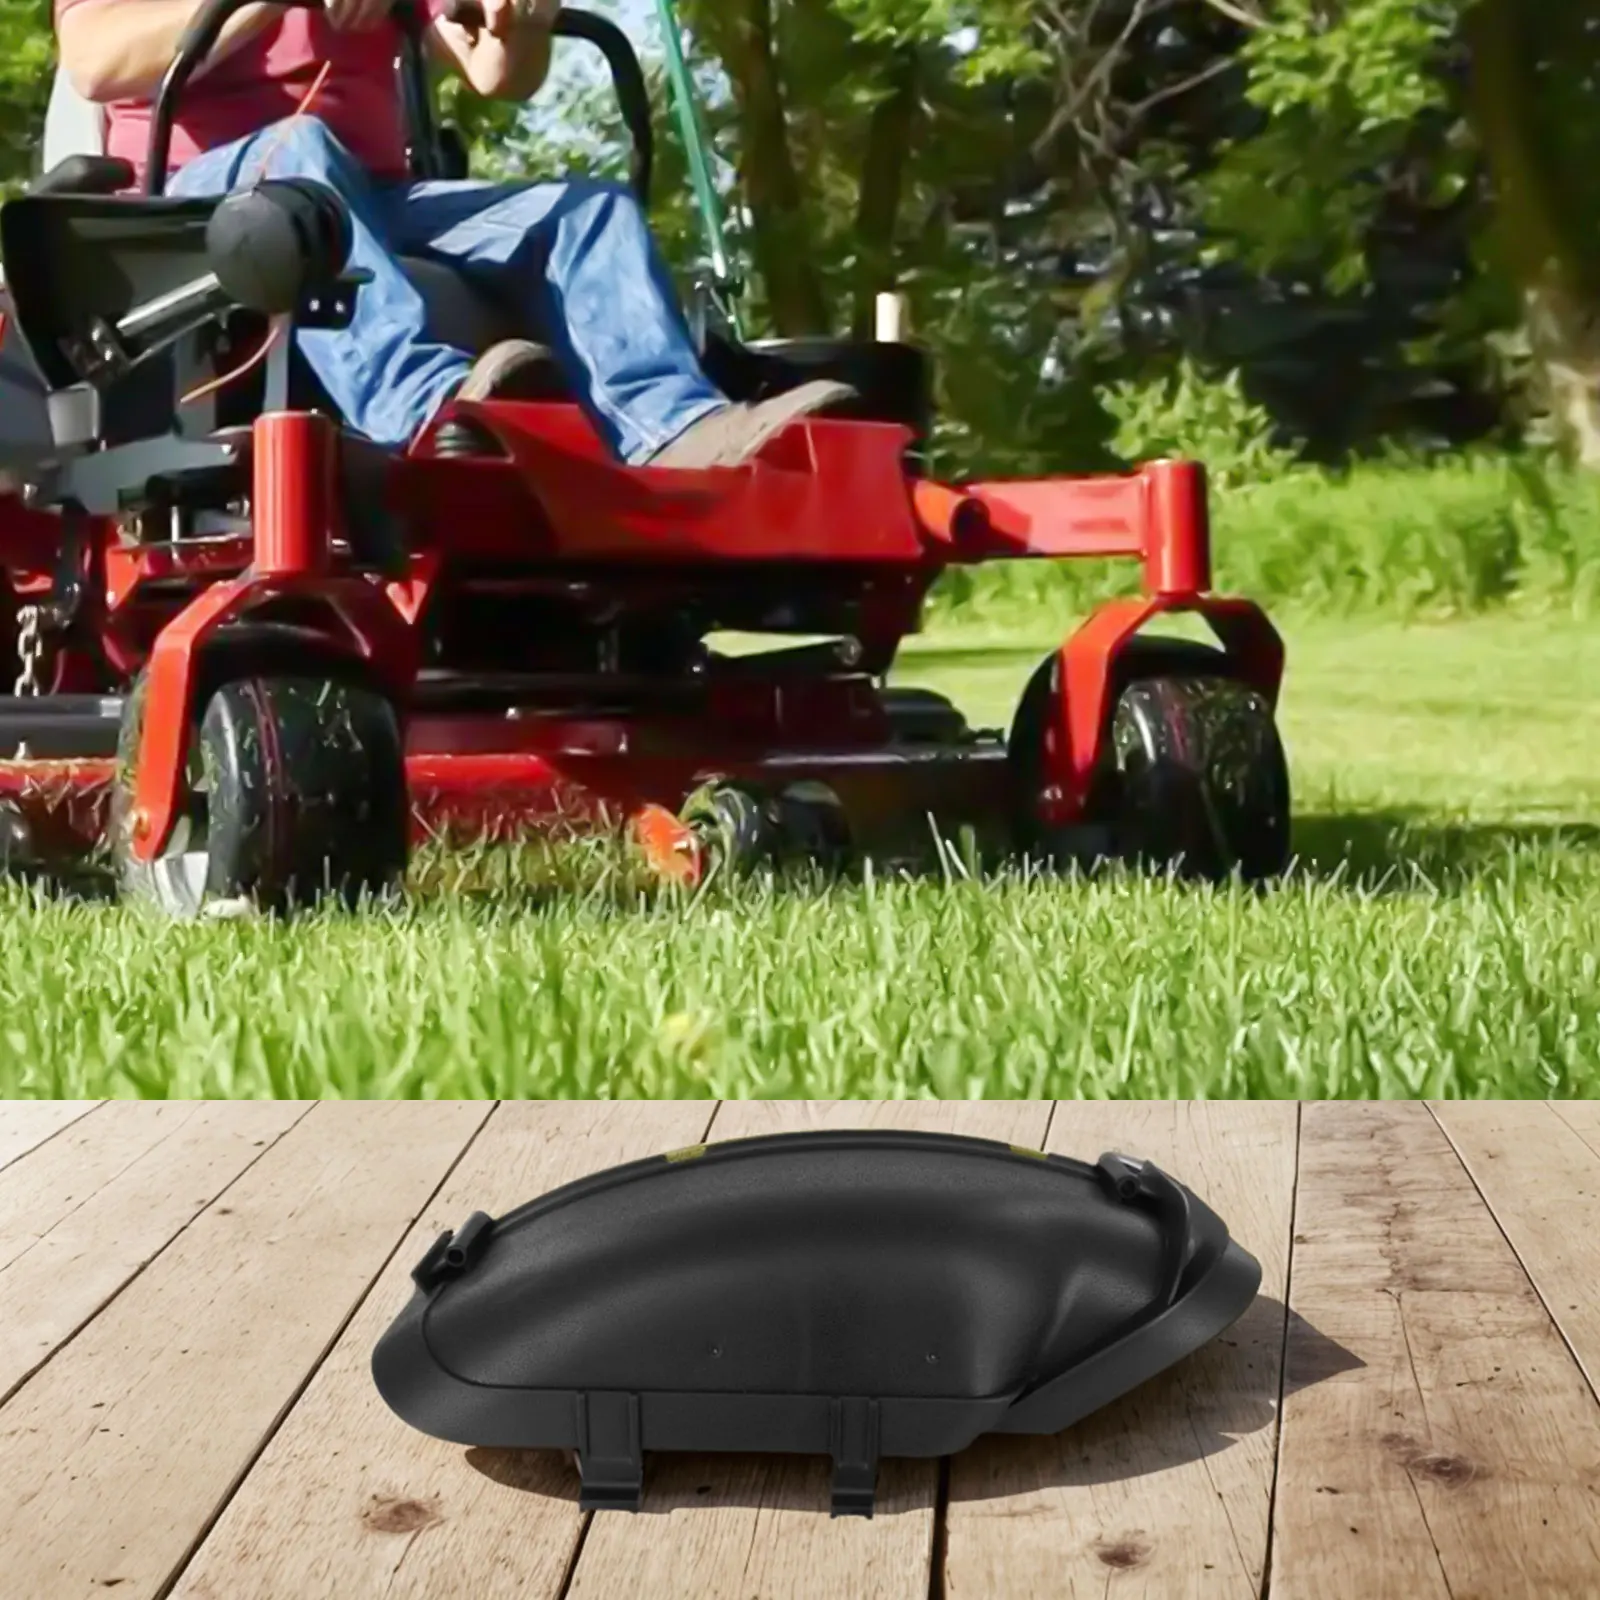
Replacing a lawn mower discharge cover is usually a simple repair. The cover may also be called a side-discharge chute, deflector, discharge guard, or mower chute. Its job is to direct grass clippings away from your feet, nearby people, flower beds, and walkways. If it is cracked, loose, missing, or held on with a temporary strap, replace it before you mow again.
Most covers attach with a hinge pin, spring, bolt, or a small set of hardware. Many repairs take 15 to 30 minutes. The hard part is not the work. It is finding the correct cover for your exact mower model. A cover for a 21-inch push mower will not fit a 42-inch riding mower, and two mowers with the same cutting width may use different hinges or spring mounts.
This guide explains how to replace a lawn mower discharge cover on push mowers, self-propelled mowers, riding mowers, and some zero-turn mowers. It also covers part numbers, safety, tools, storage, cost, common mistakes, and cases where a repair shop is the safer choice. Whether you are a new homeowner, a hands-on DIYer, or shopping for a senior family member, you can use these steps to plan the repair.

Quick answer: replacing a mower discharge cover
The best way to replace a lawn mower discharge cover is to identify the mower model, order the exact compatible deflector, disconnect the spark plug or battery, remove the old hinge hardware, and install the new cover with its spring and washers in the same order. Test that it opens and returns closed before mowing. Do not operate a mower with a missing or loose discharge guard.

A discharge cover helps contain fast-moving grass, stones, and other debris. It also reduces the chance of contact with the mower blade. The cover is not a substitute for safe mowing, but it is an important part of the mower’s safety system.
The repair works best when the mower is on a flat, dry surface. You should have the owner’s manual nearby. If the manual is missing, look for the model and serial number on the deck, frame, rear housing, or engine area.
Tools and materials for the repair
You usually need a replacement discharge cover and a few basic hand tools. The exact tools depend on the mower brand and the way the cover attaches.

| Tool or material | Why you may need it | Common notes |
|---|---|---|
| Correct replacement cover | Replaces the damaged deflector | Match the full mower model and deck size |
| Safety glasses and work gloves | Protect hands and eyes | Gloves do not replace safe blade handling |
| Socket set or wrenches | Removes bolts and nuts | Metric and standard sizes vary |
| Screwdriver or nut driver | Removes screws or clips | Use the correct tip to avoid damage |
| Pliers or needle-nose pliers | Removes cotter pins or springs | Springs can snap back |
| Replacement hinge pin or hardware | Needed if the old parts are bent or rusty | Check the parts diagram |
| Wooden block | Stops blade movement during service | Never hold the blade with your hand |
The main takeaway is to buy the cover by model number, not by appearance. Keep the old hardware until the new cover is installed. Small washers, spacers, and springs are easy to lose.
Finding the mower model and part number
Look for a label or stamped number on the mower deck, frame, handle, battery compartment, or engine housing. A gas mower may have one number for the engine and another for the mower itself. Use the mower model, not only the engine model, when ordering a side-discharge cover.
A parts diagram can show the cover, hinge rod, torsion spring, washers, and clips. Some manufacturers call the part a discharge chute. Others use terms such as deflector shield, side deflector, discharge guard, or chute door.
If the product page lists several deck sizes, confirm yours before ordering. Also check whether the cover is for a left-side or right-side discharge opening. Most standard walk-behind mowers discharge from the right side, but not all machines follow the same layout.
When you may need more than a new cover
A replacement cover will not solve every discharge problem. Inspect the deck around the hinge. If the metal or plastic mounting area is cracked, a hinge tab is broken, or the deck is badly bent, the cover may not stay in place.
You may also need a new spring. The spring should pull the cover back toward the closed position. If it is stretched, broken, or missing, the cover may hang open. On some mowers, the spring is sold separately.
Safety and preparation before touching the mower
The most important step is to prevent the blade or engine from starting. Never work under a mower that could start by accident.
Before beginning, follow this safety checklist:
- Park on a flat, dry surface.
- Turn off the engine and let hot parts cool.
- Remove the ignition key if the mower has one.
- Disconnect the spark plug wire on a gas mower.
- Remove the battery on a battery mower when the manual allows it.
- Disconnect the charger from an electric mower.
- Wear safety glasses, closed-toe shoes, and work gloves.
- Keep children and pets away from the work area.
- Clear grass, sticks, and stones from around the mower.
- Follow the owner’s manual for lifting or tilting the mower.
⚠️ Safety Warning: Never reach toward the blade to check whether it is secure. If you must tilt a walk-behind mower, follow the manufacturer’s direction. Some gas mowers should be tilted with the air filter and carburetor facing upward to reduce the chance of fuel or oil reaching the wrong parts.
Handling gas, oil, and batteries
Never refuel a hot engine. Work outdoors or in a well-ventilated area. Keep gasoline away from sparks, heaters, pilot lights, and smoking materials.
Lithium-ion batteries should be removed before service when the manual permits it. Do not place a damaged battery on a metal shelf where its terminals could touch tools. Recycle old lithium-ion batteries through a designated battery drop-off program.
For riding mowers and zero-turn mowers, set the parking brake and remove the key. Lower the cutting deck if the manual recommends it. A riding mower deck is heavy, so do not support it with an unstable object.
Match the replacement cover to the mower
The correct part must match the mower’s deck, discharge opening, hinge, and hardware. A cover that looks close may still leave a gap or fail to close.

Use this information when checking a replacement:
- Mower brand.
- Full mower model number.
- Product or serial number, if the manufacturer asks for it.
- Deck width, such as 21, 22, 42, or 54 inches.
- Side of the deck where clippings exit.
- Original cover shape and hinge style.
- Required spring, pin, washer, and bolt arrangement.
- Whether the mower uses a mulching plug or grass catcher with the cover.
The deck is the metal or polymer housing around the cutting blade. Deck size refers to the approximate cutting width. A 21-inch deck is common on walk-behind mowers. Riding mowers and zero-turn mowers may use decks from about 30 to more than 60 inches.
| Mower type | Cover style you may see | Important fit checks |
|---|---|---|
| Push or self-propelled mower | Hinged side deflector | Deck opening, hinge pin, spring, and cutting width |
| Battery or electric mower | Plastic side chute or deflector | Voltage family does not confirm cover fit |
| Riding mower | Deck discharge shield | Deck model, side, hinge brackets, and belt clearance |
| Zero-turn mower | Large deck deflector | Deck width, bracket design, and spring tension |
| Reel mower | Usually no powered side discharge cover | Check the manual before buying a part |
The main difference between a push-mower cover and a riding-mower deflector is size and mounting strength. Do not adapt one to the other. Do not drill new holes unless the manufacturer specifically provides an approved repair method.
Original, aftermarket, and used parts
An original equipment manufacturer part, often called an OEM part, is made for the mower brand and model. It may cost more, but the parts diagram and fit information are often easier to confirm.
An aftermarket cover can be a reasonable choice when the seller clearly lists compatible models. Check the return policy. A used cover may work for an older mower, but inspect it for brittle plastic, cracks, bent hinge points, and weak spring mounts.
For a gift buyer, an original part from the mower manufacturer or a trusted outdoor power equipment dealer is often the least stressful option. For an experienced DIYer, an aftermarket part may offer a lower cost, but confirm every measurement and mounting point first.
How to replace a lawn mower discharge cover
The steps below apply to many walk-behind mowers. Riding mowers and zero-turn machines may require deck removal. When the manual gives different instructions, use the manual.

1. Photograph the old cover before removal
Take clear photos from the top, side, and underside. Photograph the spring, washers, clips, and the direction of the hinge pin. These pictures act as a map when you install the new cover.
Look for parts that sit between the cover and deck. A washer or spacer may control how freely the cover moves. Set each part in a small tray or cup.
2. Disconnect the power source
For a gas mower, remove the spark plug wire and keep the boot away from the plug. The spark plug is the small ignition part screwed into the engine cylinder head. Removing the wire helps prevent an accidental start.
For a battery mower, remove the battery pack if the manual permits it. Some machines have a removable safety key or power button. Do not assume that pressing the start button is enough.
3. Inspect the blade and deck without touching the blade
Use a flashlight to look under the deck. Check for packed grass, bent metal, loose bolts, or a damaged discharge opening. Do not use your bare hand to clear debris.
If the deck is full of hardened grass, use a wooden or plastic tool after the power source is disconnected. Thick buildup can stop the new cover from sitting flat. It can also affect mowing height and airflow.
4. Remove the old cover hardware
Find the hinge pin, bolt, screw, or pivot rod. Hold the cover while removing the last fastener. A spring may be under tension, so keep your face and hands out of its path.
Some covers use a cotter pin at one end of a rod. Others use a bolt with a locknut. If a fastener is rusty, apply a suitable penetrating oil and wait. Do not force a small bolt until its head rounds off.
5. Compare the old and new covers
Place the two covers side by side. Compare the curve, discharge lip, hinge holes, mounting tabs, and spring contact points. The new part should not need heavy bending or drilling.
If the shapes differ, stop and verify the part number. A wrong cover can appear usable while leaving an opening near the deck. Return it before installation if possible.
6. Clean the hinge area
Brush loose grass and dirt from the hinge brackets. Wipe away excess oil or packed debris. Do not coat the whole cover with grease, because wet grease can collect dust and clippings.
If the hinge pin is straight and clean, you may reuse it when the manual allows. Replace bent, badly worn, or heavily rusted hardware. A worn hinge can let the cover sag.
7. Install the spring in its original position
The spring may be a torsion spring wrapped around the hinge pin. One end usually rests against the deck, and the other pushes against the cover. Install it in the same direction shown in your photos or parts diagram.
Do not guess the spring direction. If it pushes the cover open instead of closed, the deflector will not work as intended. If the spring is difficult to load, use pliers carefully and keep your fingers away from the ends.
8. Fit the new cover onto the hinge
Align the cover’s hinge holes with the deck brackets. Slide in the hinge pin or start the bolt by hand. Keep washers and spacers in their original order.
Do not tighten a bolt fully until the cover can move. The cover should pivot without binding. If the plastic flexes sharply, the brackets may not be aligned.
9. Secure the retaining hardware
Install the nut, clip, cotter pin, or retainer. Tighten bolts firmly, but do not crush a plastic hinge. A locknut should stay secure during vibration. If the manual lists a torque value, use a torque wrench and follow it.
Avoid replacing a missing clip with wire. Wire can loosen and enter the blade area. Use the correct replacement hardware.
10. Test the cover by hand
Move the cover through its full range. It should open enough for side discharge when the mower design allows it. When released, it should return toward the closed position.
Check for these signs:
- The cover does not scrape the tire.
- The cover does not touch the blade.
- The hinge does not bind.
- The spring stays in place.
- The cover closes over the discharge opening.
- No bolt or clip projects into the blade path.
- The cover does not wobble from side to side.
11. Reconnect the mower and run a stationary check
Reconnect the spark plug wire or install the battery. Keep the mower on level ground. Do not put your hands near the deck.
Start the mower only if the manual allows a stationary test. Stand clear of the discharge side. Listen for rubbing, rattling, or vibration. Turn the mower off at once if you hear an unusual sound.
12. Test the mower in a safe area
Mow a small, clear section of dry grass. Keep people, pets, windows, cars, and garden beds away from the discharge side. Stop and inspect the cover after a few minutes.
Do not mow wet grass on a slope. Wet clippings can clog the deck, and wet ground can reduce traction. A cover repair should not be used as a reason to take extra risks.
💡 Pro Tip: If the cover works only when you hold it by hand, the spring, hinge, or mounting bracket is still wrong. A properly installed cover should move on its own and stay in the designed position.
Common mistakes and how to avoid them
Most failed cover repairs come from poor part matching, missing hardware, or unsafe blade access. Slow down at the identification stage.
| Common mistake | Why it causes trouble | Better approach |
|---|---|---|
| Ordering by deck width alone | Mowers with the same width can use different covers | Match the full model number |
| Reusing a weak spring | The cover may stay open or sag | Replace the spring if tension is poor |
| Tightening the hinge too much | The cover may bind or crack | Tighten firmly without crushing plastic |
| Using wire instead of a retainer | Wire can come loose near the blade | Use the correct pin or clip |
| Drilling new mounting holes | The cover may be unsafe or misaligned | Return the wrong part |
| Working with the battery installed | The motor may start unexpectedly | Remove the battery and follow the manual |
| Testing over people or pets | Debris can be thrown at high speed | Test in a clear area |
| Mowing wet grass after repair | Clippings may clog the deck | Wait for dry turf |
The most serious mistake is mowing with a cover that does not close or stay attached. Stop using the mower until the problem is corrected.
What if the cover will not close?
First, check the spring direction. Then look for grass packed around the hinge. Make sure the hinge bolt is not too tight and that the washers are in the correct order.
A bent deck bracket can also hold the cover open. If the bracket is cracked or pulled away from the deck, do not try to force it with a hammer while the deck is installed. A repair shop can inspect the structure safely.
What if the replacement cover is too loose?
Check whether the hinge pin or mounting holes are worn. A new cover will not remove play caused by a damaged deck bracket. Verify that you did not leave out a spacer or washer.
Plastic can also become brittle from sunlight, cold storage, or age. If the replacement part feels thin or has a molding defect, take photos and contact the seller before mowing.
What if the original cover is missing?
Do not mow with an open side discharge port. A temporary piece of plywood, plastic, or sheet metal is not a safe substitute. Order the correct cover and hardware.
If the mower is old and the part is no longer available, ask a local outdoor power equipment shop about a manufacturer-approved replacement. Replacing the mower may be more practical than modifying the deck.
How long the repair takes and what it may cost
A simple walk-behind mower cover replacement often takes 15 to 30 minutes for someone with basic hand tools. Rust, missing hardware, or a damaged deck can extend the job.

| Repair situation | Typical time | Cost factors |
|---|---|---|
| Cover and spring are easy to reach | 15–30 minutes | Part price and basic tools |
| Rusted hinge or missing hardware | 30–60 minutes | Penetrating oil and new fasteners |
| Riding mower deck deflector | 30–90 minutes | Larger parts and deck access |
| Damaged hinge bracket | Varies | Welding, deck repair, or replacement |
| Shop diagnosis and installation | Varies by location | Labor rate and parts availability |
Prices change by brand, mower size, and parts availability. Check current listings rather than relying on an old price. A low-cost cover is not a bargain if it does not fit.
For a small, flat yard with a 20- to 22-inch push mower, a DIY repair usually makes financial sense when the deck and engine are in good condition. For a large hilly yard, a riding mower or zero-turn deflector may be heavier and harder to access. In that case, professional installation can be worth the labor charge.
Is replacing the cover worth it?
It often is when the mower starts easily, cuts well, and has no major deck or engine damage. A new cover can extend the useful life of an otherwise sound mower.
Replacement may not make sense when the mower also needs a blade, belt, battery, tires, spark plug, air filter, and major deck repairs. Compare the total repair cost with a newer push mower, battery mower, or used riding mower.
A well-maintained gas mower may last many years, but its blades, belts, spark plugs, air filters, and batteries wear out first. Battery mowers also need attention to battery age, storage temperature, and charger condition.
Beginner tips for a safer first repair
A first-time homeowner does not need a full mechanic’s toolbox. You need good identification, safe power isolation, and patience.

Start by cleaning the mower and taking photos. Label small parts as you remove them. If a spring or pin seems to require force, stop and check the diagram rather than guessing.
Choose a calm day with dry weather. Working in a cramped shed makes it harder to see the hinge and easier to lose hardware. A garage with the door open can work well, but keep fuel and sparks apart.
For seniors or anyone with weak grip strength, a battery mower with a light deck may be easier to handle than a heavy gas mower. Still, a battery mower can have a strong blade and must be disconnected before service. A family member can help with lifting and spring installation.
🎁 Gift-Buyer Note: If you are helping a new homeowner, buy the cover only after photographing the mower model label. A gift card from a local outdoor power equipment dealer may be better than a guessed part. Include safety glasses and work gloves, but do not assume the mower is safe until the cover is installed and tested.
Mowing choices after the repair
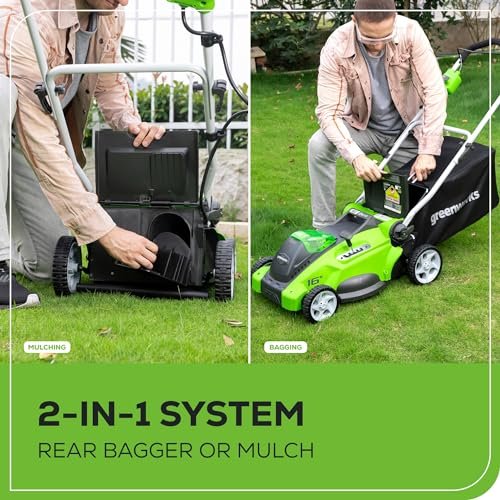
A side-discharge cover is only one part of lawn care. Many mowers also support bagging or mulching. Mulching means the mower cuts clippings into smaller pieces and leaves them on the turf. A mulching kit may use a plug or special blade.
Use the mower setting that matches the grass and weather:
- Side discharge can suit fast spring growth and large open lawns.
- Bagging can help when clippings are long or wet.
- Mulching can suit regular mowing when no heavy thatch is present.
- A grass catcher may be useful near sidewalks and driveways.
- A string trimmer or edger can finish areas the mower cannot reach.
- A leaf blower can move clippings from hard surfaces.
Raise the mowing height during drought or heat when suitable for your grass type. Do not remove more than about one-third of the grass blade at one mowing. Turfgrass needs enough leaf surface to keep growing.
When to hire a repair shop
A mower repair shop is the safer choice when the deck, blade, hinge bracket, or engine has major damage. You should also seek help if you cannot confirm the correct part.

Call a professional if:
- The deck is cracked near the blade.
- The blade spindle or shaft appears bent.
- The blade turns when it should be secured.
- The mower vibrates after the repair.
- The spring is under high tension and cannot be installed safely.
- A riding mower deck must be removed or lifted.
- Fuel leaks during the repair.
- Electrical wires or battery terminals are damaged.
- The discharge opening has been altered by a previous owner.
- The correct part is discontinued and an adaptation is being suggested.
A repair shop can inspect blade balance, spindle bearings, deck brackets, and belt alignment. This matters on riding and zero-turn mowers, where a loose deflector may signal a larger deck problem.
Do not weld or drill a discharge guard without guidance from the manufacturer or a qualified technician. A repair that looks strong in the garage can change the path of thrown debris.
Maintenance after installing the new cover
A little care can keep the new deflector moving and reduce early wear. Inspect it each time you mow, especially during the first few uses.

| Maintenance task | How often | What to check |
|---|---|---|
| Look at the cover and hinge | Before each mowing session | Cracks, loose clips, and missing spring |
| Clean packed grass | As needed | Hinge movement and discharge opening |
| Check fasteners | Monthly during heavy use | Loose bolts, nuts, and pins |
| Inspect the blade | Every 20–25 mowing hours or as manual states | Dull, bent, cracked, or damaged blade |
| Check gas mower air filter | As the manual states | Dust, oil, and blockage |
| Check spark plug | Seasonally or by manual schedule | Wear, fouling, and correct gap |
| Store battery mower correctly | Before long storage | Cool, dry place and approved charge level |
Do not spray water into the engine, battery compartment, control panel, or bearings. If you wash the underside, follow the owner’s manual and let the mower dry before storage.
Store the mower in a dry shed or garage. Keep it away from sprinklers, roof leaks, and direct sun. Gas equipment may need fuel stabilizer for storage, but follow the engine maker’s instructions and local fuel-storage laws.
Signs the cover needs replacement again
Replace the cover if it is cracked, does not return toward the closed position, or has a worn hinge that lets it swing into the tire or blade area. A missing spring is also a reason to stop and inspect the assembly.
Cold weather can make some plastics less flexible. Heat and sun can make older plastic brittle. Wet grass and thick clippings can add stress to the hinge. These climate effects do not always mean the mower is defective, but they can shorten the life of a weak cover.
Environmental and local rules to consider
Mower repairs create less waste than replacing a working machine. Recycle usable metal and plastic where local programs accept them. Donate or recycle a usable mower instead of leaving it at the curb without checking local rules.
🌿 Eco or Disposal Note: Take old gasoline and engine oil to a household hazardous-waste site or approved collection point. Do not pour fuel or oil onto soil, into a storm drain, or into household trash. Recycle lithium-ion mower batteries through a designated battery program.
Noise and fuel rules vary by city, county, and HOA. Some areas limit gas equipment during certain hours. Others have restrictions on fuel storage or gas-powered lawn equipment. Battery, corded, and robotic mowers can reduce local noise, but they still require safe operation and proper disposal.
📜 Check Local Rules: Confirm HOA policies, quiet hours, gas-equipment limits, and battery or fuel disposal rules before buying a replacement mower or changing how you mow. Local requirements can change.
Frequently asked questions
Q: Can I use a universal lawn mower discharge cover?
A: Some aftermarket covers fit a range of models, but “universal” does not mean every mower. Confirm the deck opening, hinge points, spring, side, and full model compatibility. Skip a part that requires unsafe drilling, bending, or blocking the blade path.
Q: Is a discharge cover the same as a mulching plug?
A: No. A discharge cover directs or closes the side opening. A mulching plug blocks the opening so clippings stay inside the deck for repeated cutting. Some mowers use both parts, but they serve different purposes.
Q: Can I mow without the side discharge chute?
A: You should not mow with a missing, cracked, or loose safety cover. The open port can allow debris to leave the deck without proper control. Install the correct replacement before use.
Q: How do I know which side-discharge cover I need?
A: Find the mower’s full model number and compare it with the manufacturer’s parts diagram. Check the deck width, discharge side, hinge style, spring, and hardware. A photo alone is not enough for many mower brands.
Q: What if the new mower cover does not line up?
A: Stop installation and compare the part number. Check for a missing washer, spacer, or bracket. Do not drill new holes or force the plastic into place unless the manufacturer gives specific instructions.
Q: Should the discharge cover stay open or closed?
A: It depends on the mowing mode. In side-discharge mode, the cover may lift as clippings exit. When the mower is off, it should return toward the designed closed position. Follow the manual for bagging and mulching settings.
Q: How often should I replace a mower discharge cover?
A: Replace it when it cracks, breaks, becomes loose, or no longer controls the discharge opening. There is no fixed replacement schedule. Inspect it before each mowing session.
Q: Can I replace a riding mower discharge cover myself?
A: Sometimes. The job is easier when the cover is accessible and the deck stays installed. If the deck must be removed, lifted, or supported, use the manual or hire a technician. Riding mower decks are heavy and can cause serious injury if they fall.
Q: Does a battery mower need a discharge cover?
A: Yes. Electric power does not make the blade harmless. Battery mowers can throw stones and clippings, so the cover and other guards must remain in place.
Q: What other mower parts should I inspect during this repair?
A: Check the blade, blade bolt, deck, hinge bracket, spring, wheels, belt if fitted, and grass catcher. On gas mowers, inspect the spark plug and air filter according to the maintenance schedule. On battery mowers, inspect the battery housing and terminals for damage.
Q: Is it better to bag, mulch, or side discharge?
A: Side discharge suits open areas and longer grass. Bagging suits areas where you want to collect clippings. Mulching suits regular mowing when the grass is not too tall or wet. Your grass type, mowing height, weather, and local cleanup rules should guide the choice.
Q: What mower is easiest to maintain for a small yard?
A: A light push mower or battery mower may suit a small, flat yard with limited storage. A corded mower can work where an outdoor outlet and safe cord path are available. A riding mower is usually unnecessary for a small lot and needs more storage and maintenance.
Q: What mower is better for hills?
A: A self-propelled walk-behind mower can help on some moderate slopes, but it is not safe on every hill. Never mow wet grass on a slope. Avoid riding mowers across steep slopes unless the manual and local safety guidance clearly allow it. Check slope limits before choosing a mower.
Q: Are robotic mowers a replacement for a side-discharge mower?
A: Robotic mowers use small repeated cuts and usually leave clippings on the lawn. They do not replace a walk-behind mower for every yard. They need boundary setup, charging space, and a yard that fits the manufacturer’s slope and layout limits.
Conclusion: finish the repair with a careful test
Replacing a lawn mower discharge cover is a manageable DIY task when the correct part is available and the mower is safely disconnected. Identify the full model number, compare the new cover with the old one, reinstall the spring and hardware in the correct order, and test the cover before cutting grass.
The best repair is not always the cheapest part. It is the part that fits the mower, closes the discharge opening, and stays secure during vibration. For a small flat yard and a healthy push mower, this repair can be a sensible way to extend the machine’s useful life. For a heavy riding mower, a damaged deck, or a tense spring system, professional help may be the better choice.
Always wear eye protection, hearing protection, closed-toe shoes, and work gloves. Clear debris first. Keep children and pets away. Disconnect the spark plug or remove the battery before service. Follow the owner’s manual, then check the cover before every mowing session.
Affiliate disclosure: This article may contain affiliate links. If you buy through a link, we may earn a commission at no extra cost to you. Product availability, compatibility, specifications, and prices can change, so confirm details with the manufacturer or seller before purchasing.


2 Comments