


When you’re ready to mow and your riding lawn mower won’t start, it’s more than just a delay—it’s frustrating. You turn the key, hear a click, or maybe nothing at all, and realize the battery isn’t charging. Many homeowners face this issue every mowing season, and while it sounds complicated, it often comes down to a few common faults. Whether it’s a corroded terminal, a bad voltage regulator, or a weak alternator, you can usually pinpoint the problem without calling a repair shop.
In this guide, we’ll take a deep dive into every reason why a battery not charging on riding lawn mower happens. You’ll also learn practical, easy-to-follow steps to test and fix the issue at home. By the end, you’ll be able to restore your mower’s charging system, prevent future breakdowns, and keep your yard work on schedule.
Understanding the Basics of Your Mower’s Charging System
Before you can fix a riding mower battery not charging, it helps to understand how the system works. Think of your mower’s electrical system like the one in your car—but smaller and simpler. When you start the engine, a small alternator (often called a stator) under the flywheel generates electricity. That power flows through a voltage regulator and then into the battery, keeping it topped up while the mower runs.
Here’s a quick breakdown of the main parts:
- Battery: Stores power to start the engine and run accessories like lights and PTO clutches.
- Stator/Alternator: Produces electrical current while the engine is running.
- Voltage Regulator/Rectifier: Converts AC current from the stator to DC and controls charging voltage.
- Key Switch & Fuse: Route power safely through the system.
- Grounds and Wiring: Provide return paths for electrical flow.
If any of these parts fail—or if there’s corrosion, a loose belt, or a blown fuse—the battery stops receiving charge. The result? You end up with a mower that starts fine one day and goes dead the next.
Common Causes of Battery Not Charging on Riding Lawn Mower
The good news is, most charging issues are caused by simple, fixable problems. Below are the most common culprits and how they show up in real life.
| Cause | Symptoms | Quick Solution |
|---|---|---|
| Corroded or loose terminals | White powder on battery posts, weak crank | Clean and tighten terminals |
| Blown fuse | No power to key or starter | Replace with correct amp rating |
| Faulty alternator/stator | No charging voltage from engine | Test AC output under flywheel |
| Bad voltage regulator | Battery overcharges or stays at 12V | Replace regulator/rectifier |
| Worn or slipping belt | Alternator not spinning fast enough | Adjust or replace belt |
| Bad ground | Dim lights, inconsistent charging | Clean and retighten ground straps |
| Sulfated battery | Battery won’t hold charge | Replace with new 12V mower battery |
Each issue has its own fix, but before replacing anything, it’s smart to start with simple inspections and tests.
Quick Checks Before You Start Replacing Parts
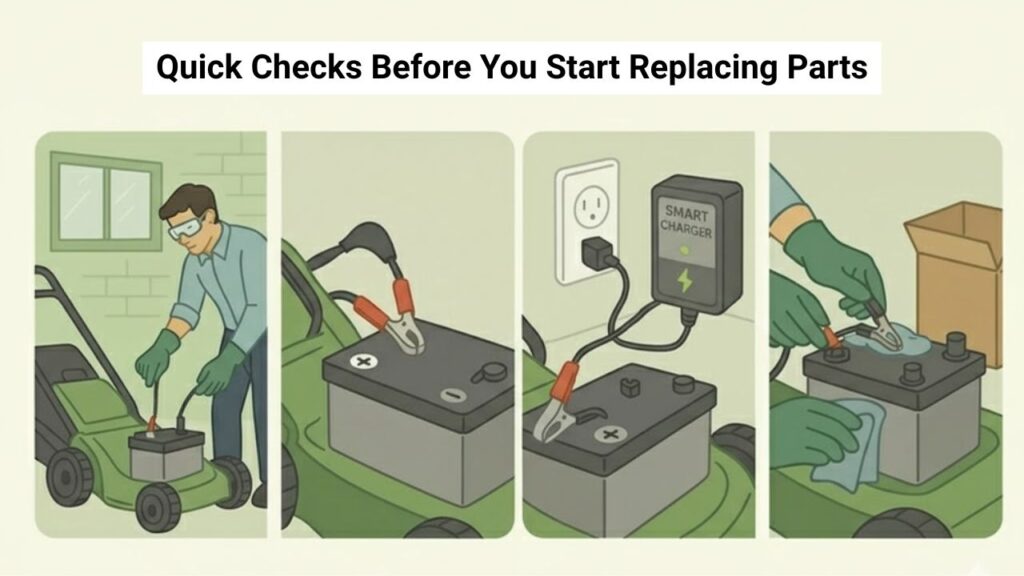
If your riding lawn mower battery isn’t charging, begin with a few quick checks. These are easy, take less than 20 minutes, and often solve the problem right away.
1. Inspect the Battery Terminals:
Pop open the hood or seat panel and look at the battery posts. Corrosion looks like white or greenish crust. That buildup blocks current flow. To clean it, remove the negative cable first, then the positive. Use a wire brush or a mixture of baking soda and water to scrub away corrosion. Dry everything, apply a bit of dielectric grease, and reconnect the cables—positive first, then negative.
2. Check the Fuse:
Most mowers have a small inline fuse near the solenoid or battery. If it’s blown, the charging system stops working entirely. Replace it with the same amperage rating (usually 15A to 30A). Never use a higher-rated fuse—it can hide deeper issues and risk wire damage.
3. Verify Ground Connections:
A poor ground can make a healthy charging system look dead. Find where the negative cable connects to the frame or engine block. Remove the bolt, clean both metal surfaces, and reattach firmly. Do the same for the voltage regulator ground if accessible.
4. Examine the Belt (if applicable):
Some older models use a belt-driven alternator. A slipping or cracked belt means the alternator won’t spin fast enough to generate power. Replace any glazed or frayed belts and set proper tension—typically about half an inch of deflection.
After these steps, use a multimeter to check your battery voltage. A healthy, fully charged battery should read between 12.4 and 12.7 volts with the engine off. If it’s below 12.2 volts, charge it fully before further testing.
How to Test Charging Output with a Multimeter
Once your basic checks are done, it’s time to see if your mower is actually charging. This is where your multimeter becomes your best friend.
Step 1: Test the Battery at Rest
Set the meter to DC volts and measure across the battery terminals with the engine off.
- 12.6–12.8V = Good battery
- 12.3–12.5V = Weak or partially charged
- Below 12.2V = Likely sulfated or failing
Step 2: Start the Engine and Rev to Full Throttle
Now, measure the voltage again while running. You should see between 13.4 and 14.6 volts. That means the alternator and regulator are charging properly. If it stays around 12.5V, the system isn’t charging. If it climbs above 15V, the regulator is likely overcharging.
Step 3: Check Voltage Drop While Starting
When you crank the engine, the voltage shouldn’t drop below 9.6V. If it does, your battery is weak or there’s excessive resistance in the cables.
These three tests quickly tell you whether the issue lies with the battery or the charging system.
Identifying Your Mower’s Charging System Type
Not all mowers use the same setup, and identifying yours helps narrow down the fault. There are three main types:
- Stator and Regulator System (Modern Engines)
This is the most common system found on Briggs & Stratton, Kohler, and Kawasaki engines. The stator under the flywheel generates AC current, which goes through a voltage regulator/rectifier before reaching the battery. - Single-Wire Stator with Inline Diode
Simpler systems found on small engines. The diode converts AC to DC and limits backflow. It’s usually part of the charge wire leading to the battery. - Starter-Generator Belt System (Older Mowers)
In this setup, the same unit both starts the engine and generates charge. It’s driven by a belt, similar to an alternator in a car.
Knowing your system type tells you what to test next. If you have a two-wire stator, you’ll be testing AC voltage output. If it’s a single-wire system, you’ll measure DC voltage and inspect the diode.
Testing the Alternator or Stator Output
If your battery isn’t getting a charge even though it’s healthy, it’s time to check the alternator (stator). This test tells you if your engine is generating current.
For a Two-Wire Stator System:
- Disconnect the two stator wires from the regulator.
- Set your multimeter to AC volts.
- Start the engine and increase to full throttle.
- Probe across both stator wires.
You should see around 28–36 volts AC at full throttle. If you see little or no voltage, the stator is bad or the flywheel magnets are weak. Check for burned wires or melted connectors too.
For a Single-Wire System with Diode:
- Locate the single wire with a small bump (that’s the diode).
- Disconnect it from the harness.
- Set your meter to DC volts and measure from the wire to ground.
- You should get between 13 and 30 volts DC at full throttle.
If you read 0V, the diode may be open or shorted. Test the diode with your meter’s diode setting—it should allow current in one direction only. Replace the wire harness if it fails.
Testing and Replacing the Voltage Regulator
When your stator produces good voltage but the battery not charging on riding lawn mower persists, the voltage regulator is the next suspect. This component smooths and controls current before it reaches the battery.
To Test the Regulator:
- Reconnect the stator wires and start the engine.
- With the engine running, back-probe the regulator output wire.
- You should read around 13.5–14.5 volts DC at the battery with full throttle.
If it’s stuck at 12.6V or surges over 15V, the regulator is bad. Also, check its ground. Many regulators rely on the mounting bolts for grounding. If the surface is painted or corroded, it can block the ground path. Sand the area clean, use a star washer for bite, and reinstall.
Replacing the Regulator:
Unplug the old one, clean the mount, and install the new unit firmly. Make sure to use OEM-rated parts that match your mower’s amp output—mixing different regulator types can burn out your stator.
Wiring, Key Switch, and Load Problems
Even if your charging system components are fine, wiring issues can stop current from reaching the battery. A broken charge wire, corroded connector, or faulty key switch can interrupt the circuit.
Start by tracing the charge lead from the regulator to the battery or solenoid. Look for frayed insulation, burned spots, or pinched sections under panels. Repair any damage and ensure connectors are tight.
Next, inspect the key switch. Some models route the charge circuit through the ignition switch. With the key in the RUN position, check continuity between the “L” and “B” terminals using your multimeter. No continuity means a bad switch—replace it.
Lastly, test for electrical overloads. Accessories like headlights or PTO clutches can draw too much current if their wiring is damaged. Try disconnecting these loads and see if charging improves. If voltage rises, you’ve found the drain.
Fixing a Bad Stator, Regulator, or Diode
When testing confirms a failed component, replacement is the only real solution. These parts are not repairable but are usually easy to replace with basic tools.
Replacing a Stator:
You’ll need to remove the engine shroud and flywheel. Use a proper flywheel puller—never pry it with screwdrivers. Once removed, unbolt the stator, install the new one, and torque the flywheel nut to your engine’s specification (usually between 55–110 ft-lb).
Replacing a Diode Harness:
For single-wire systems, simply disconnect the old wire and plug in a new one with the correct polarity. Use heat-shrink tubing to seal any crimped joints.
Replacing a Voltage Regulator:
Mount the new regulator with clean metal-to-metal contact, ensuring proper ground. Reconnect wires according to color codes, and secure with zip ties away from heat or moving parts.
Final Testing and Verification After Repairs
Once you’ve replaced or repaired any faulty parts, it’s time for the final verification. This step ensures that your charging system is working efficiently and that the issue won’t return after a few mowing sessions.
Start by reconnecting the battery and turning on the ignition. Watch for any unusual sounds or warning lights (if your mower has a display). Then, start the engine and increase the throttle to full. Set your multimeter to DC volts and measure across the battery terminals. The reading should now show between 13.4 and 14.6 volts, meaning your mower is charging correctly.
Next, turn on the headlights or engage the PTO clutch. The voltage may dip slightly but should stay above 13.2 volts. If it drops below that, it could indicate weak alternator output or extra electrical resistance somewhere in the wiring.
Let the mower run for about 10–15 minutes. After shutting it off, recheck the battery voltage. It should stay close to 12.7V even after a short rest. This means your system is holding charge well and not leaking current. If the battery gets hot or smells like sulfur, immediately stop the engine—this is a sign of overcharging, usually due to a faulty regulator or bad ground.
Remember, consistency matters. If voltage readings fluctuate widely, recheck the connections, grounds, and regulator mount. A bad ground or corroded connector is a silent killer of many charging systems.
Preventing Future Charging Problems
Once your mower is back in shape, the next step is keeping it that way. A little prevention goes a long way toward avoiding another battery not charging on riding lawn mower scenario.
1. Keep Connections Clean and Tight
Corrosion starts small but grows fast, especially in damp environments. Clean battery terminals at the start of every season using a wire brush or baking soda solution. Apply a thin coat of dielectric grease to prevent oxidation. Tighten terminals firmly—loose clamps can interrupt current flow and cause arcing.
2. Protect Wiring from Damage
Wires that rub against sharp metal edges or hot engine parts wear out quickly. Use zip ties or clips to secure harnesses neatly. Replace any cracked or oil-soaked insulation. Keep wires clear of pulleys and belts.
3. Maintain Proper Belt Tension
If your mower uses a belt-driven alternator or starter-generator, inspect the belt regularly. Replace worn, glazed, or cracked belts. A slipping belt can cause inconsistent charging and premature bearing wear.
4. Store the Battery Correctly
During winter or long periods of inactivity, remove the battery and store it in a cool, dry place. Connect it to a smart battery maintainer that delivers a small, steady charge (1–2 amps). This keeps the battery healthy and prevents sulfation.
5. Run the Engine at Full Throttle When Mowing
Charging systems on riding mowers are designed to work efficiently only at higher RPMs. Running the mower at low throttle for long periods may prevent proper charging. Keep it near full throttle while mowing or using the PTO.
6. Replace Fuses with the Correct Rating Only
Never use a higher-rated fuse “just to keep it from blowing.” Oversized fuses can hide short circuits and destroy expensive components like the regulator or stator. Always match the original amperage.
7. Keep Cooling Fins and Air Vents Clear
Voltage regulators rely on airflow to stay cool. Blocked fins or clogged shrouds can cause overheating and premature failure. During maintenance, brush off grass clippings and clean air passages.
These habits take only a few minutes each season but can add years to your mower’s electrical system life.
Pro Tips for Diagnosing and Maintaining Your Mower’s Charging System
Over time, experienced mechanics learn small tricks that make diagnosing and maintaining a mower easier. Here are a few worth knowing:
- Always test at full throttle. Many mowers appear not to charge when idling, but at higher RPMs, the system produces full voltage.
- Use a star washer under the regulator’s mounting bolt. It bites through paint and ensures a solid ground.
- If the stator shows strong AC voltage but no DC output, the regulator is almost always the problem.
- Perform a parasitic draw test. Connect an ammeter in series with the battery’s negative cable (key off). Anything above 0.05 amps means there’s a power drain. Check accessories or the ignition switch for leaks.
- Take pictures before disassembly. Especially when removing the flywheel or routing wires. A quick photo saves hours of confusion later.
- Smelling sulfur or hearing boiling sounds? Stop immediately—your system is overcharging, which damages battery plates fast.
- Use the correct battery size. Most riding mowers perform best with a 230–350 CCA, 28–35 Ah 12V garden tractor battery. An undersized one can’t handle charging spikes and fails early.
Following these expert habits helps you spot problems early before they grow expensive.
When It’s Time to Call a Professional
Even though most charging issues are easy to fix, some situations require expert tools and knowledge. Here’s when it’s best to call in a pro:
- You suspect stator failure, but don’t have the tools to remove the flywheel.
- The mower uses a starter-generator system, which requires precise regulator calibration.
- You’ve replaced multiple regulators and still have no charge—this could point to a deeper wiring or grounding issue.
- The mower’s wiring harness is burnt or melted.
- You don’t feel comfortable working near the flywheel or electrical circuits.
When choosing a repair shop, pick one familiar with your engine brand—like Briggs & Stratton, Kohler, or Kawasaki. Ask if they perform actual charging system diagnostics (stator and regulator tests) instead of just swapping parts.
Typical costs for professional repairs can vary:
- Diagnostic testing: $50–$120
- Voltage regulator replacement: $30–$90 (parts) + $50–$120 (labor)
- Stator replacement: $60–$180 (parts) + $120–$250 (labor)
- Battery replacement: $40–$120
While that might sound pricey, professional testing ensures accurate diagnosis and protects your mower from further damage.
Alternative Fixes and Smart Upgrades
Sometimes, fixing an old charging system isn’t cost-effective. In these cases, upgrading or using an alternative charging solution might make more sense.
| Solution | Advantages | Drawbacks | Best For |
|---|---|---|---|
| Replace regulator only | Quick and affordable | Won’t help if stator is bad | Minor regulator failures |
| Replace stator + regulator | Full system renewal | Higher cost and labor | Older mowers with corrosion or burned wires |
| Add battery maintainer | Extends battery life | Doesn’t charge while mowing | Seasonal users or occasional mowing |
| Upgrade to higher-amp regulator | Supports extra lights or PTO | Must match stator rating | Heavy-duty or accessorized mowers |
| Buy new mower/battery combo | Warranty and reliability | Highest cost | Very old or unreliable machines |
If your mower’s wiring and charging parts are heavily corroded or burnt, it may be more practical to invest in a replacement rather than chasing recurring failures.
Frequently Asked Questions (FAQs)
1. What voltage should a riding mower battery show while running?
A healthy charging system produces 13.4 to 14.6 volts at full throttle. If the reading stays around 12.6 volts, the system isn’t charging. If it goes beyond 15 volts, the regulator is overcharging.
2. How can I tell if the voltage regulator is bad?
If your stator shows good AC output but the battery voltage doesn’t rise—or spikes above 15V—the regulator is likely defective. Check for a clean ground before replacing it.
3. Can a weak or bad battery prevent charging?
Yes. A battery that’s sulfated or has a shorted cell won’t accept charge properly. It can also overwork the regulator. Always test or temporarily swap in a known-good battery first.
4. Why does my mower charge only when lights are off?
This means your charging system is marginal. The added load from the lights drops voltage. Test stator output and regulator condition, and inspect wiring for resistance or corrosion.
5. Why does my fuse keep blowing?
A shorted regulator, frayed charge wire, or faulty PTO clutch can overload the circuit. Inspect all wiring along the frame and around the engine for chafing or melted insulation.
6. Do I need to remove the flywheel to test the stator?
No. You can test stator output at its connector. However, to replace a bad stator or repair wires underneath, you will need to remove the flywheel using a puller.
7. How long do mower batteries last?
Typically 3 to 5 years with good care. Using a battery maintainer in winter and avoiding deep discharges can double their life expectancy.
Long-Term Maintenance Schedule
For reliable performance, treat your mower’s electrical system as part of your regular maintenance plan. Here’s a simple schedule to follow:
| Maintenance Task | Frequency |
|---|---|
| Clean and grease battery terminals | Every 3 months |
| Check and replace fuse if needed | Every season |
| Test battery voltage | Every month during use |
| Inspect regulator ground and wires | Twice per season |
| Check belt tension (if applicable) | Every 50 hours |
| Use smart charger in winter | Continuous during storage |
Following this plan not only keeps your mower charging properly but also extends the life of all electrical components.
Final Thoughts: Getting Your Mower Back in Action
Dealing with a battery not charging on riding lawn mower may feel intimidating at first, but once you break it down step-by-step, it becomes manageable. In most cases, a little cleaning, testing, and tightening is all it takes to bring your mower back to life.
Start simple:
- Check and clean battery connections.
- Verify the fuse and ground wires.
- Test voltage at rest and while running.
- Diagnose stator and regulator performance.
Replace only what your tests confirm as faulty. This approach saves money, avoids guesswork, and ensures lasting repairs.
By maintaining your mower’s charging system, you’re not just saving time—you’re preserving the heart of your machine. Keep those grounds clean, the belts tight, and the voltage steady. Then, the next time you turn the key, your mower will roar to life, ready to tackle every patch of grass without missing a beat.
